Happy Monday dear friends!
So I’ve been scanning old posts I’ve created over the past 3 years and I have one word: Ouch.
In the beginning, not only were my editing skills meretricious (at best) but my photographed sucked, man. Like, seriously. And my recipes required more ingredients than a fully stocked bloody grocery store!
Granted, I knew nothing about taking pictures. And I was new to recipe development. And I know it takes a while to find your writing “voice” – as it turns out, mine is often vulgar, offensive and at times a little too candid. That being said, man alive! …my recipes were all over the place!
Turns out, good food photography involves standing still. With lots of good, natural light. Moving in dungeonous rooms as you click click click away is not conducive to taking good pictures. Am I right, eh?
When it comes to editing, take good notes when you develop a recipe. Write your post. Read. Re-read. Read aloud. Re-read again. Walk away. Come back. Read out loud one more time. Pour a glass of wine. Have someone else read. Then – and only then – publish. And even after all that, some mistakes still sneak through. Luckily, I have you guys to keep me honest.
So now I’m in the process of going through old recipes, weeding out the ones that need a little work.
While I value the posts I made at the time – and therefore will not be deleting them (yet) – I am also prepared to make them again and re-post – hence the “take 2”. What do you think? Should I keep the old posts? Or start entirely fresh? I can’t tell you the horror I feel when someone discovers my blog for the first time and finds themselves staring at the wrong end of a vegetable wellington.
Again, I say, ouch.
If you notice any old posts that might need a little tweaking, please feel free to let me know. I want to make this page the best resource and space to connect as I possibly can. And that means making old posts better.
My darlings, you make me want to be a better blogger.
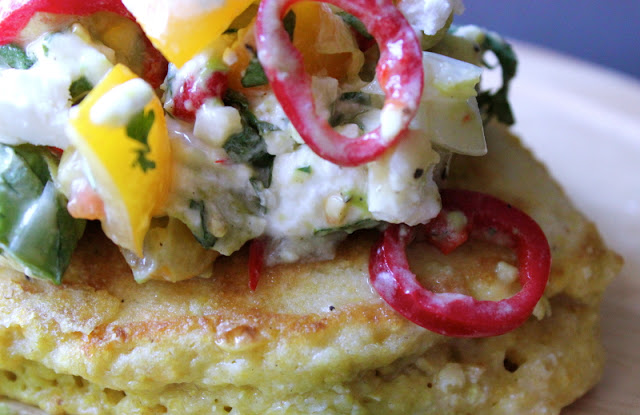
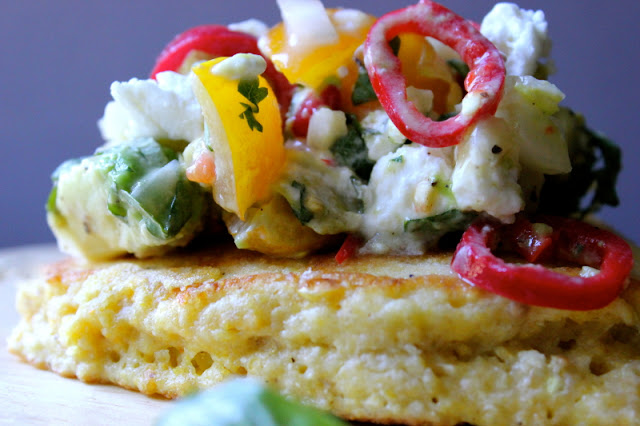
And that’s where this post comes from. It’s an oldie, but a goodie. And it’s all about fresh corn cakes! I’ve been waiting all damn year to remake it because it was that efing good. Seriously – I dream about these bad boys. In a sexy way. And you will too.
Be sure to use fresh corn with this dish – canned or frozen just won’t have the same brightness in flavor and you may end up with a heavy, gooey inedible hunk of carbs. And if you like your carbs as much as I do, you want them to be good. Real good, baby. Heck yeah!
Fresh Corn Cakes with Avocado Citrusy Goat Cheese Salsa
Prep
Cook
Total
Yield 6 servings
Ingredients
- 2 C Fresh Corn Kernels, cut from the cob (organic if possible - avoid GMOs).
- 1 C All-Purpose White Flour.
- 1/2 C Fine Ground Cornmeal.
- 1 Tsp Baking Powder.
- 1/2 Tsp Baking Soda.
- 1 Tbsp Sugar.
- 1 Tsp Kosher Salt.
- 2 Free-Range Organic Eggs, lightly beaten.
- 2 Tbsp Milk.
Ingredients for Salsa:
- 2 Large Tomato (or a big handful of tiny ones), chopped.
- 1 Red Chili, thinly sliced.
- 2 Tbsp Cilantro, roughly chopped.
- 1/2 a small size Sweet Onion, finely chopped.
- 1 or 2 Large Garlic Clove(s), minced.
- Fresh Juice of 1 or 2 Limes (depending on how much juice you get out).
- 1 Avocado, pitted and diced.
- Small Palmful of quality goat cheese, crumbled.
- Coarse Sea Salt & Fresh Cracked Black Pepper.
Instructions
- Pre-heat your oven to 200 degrees F.
- While that heats, pulse corn several times in a food processor until coarse chunks form - you don't want puree.
- Transfer the corn to a large bowl and combine with flour, cornmeal, baking powder, soda, sugar, salt and pepper to taste. Add eggs and milk and whisk until just combined.
- Pre-heat a splash of olive oil in a large skillet over medium heat.Once hot, drop batter by tablespoonfuls into the skillet, but be careful not to over-crowd the pan or they won't cook properly. Cook 1 - 2 minutes per side until golden brown and transfer to a cookie sheet to keep warm in your oven until all the cakes are ready to be served.
- For the salsa, combine all the ingredients in a bowl just before serving and mix well, season to taste.
- Serve cakes topped generously with the salsa.
- Eat.
What have you learned from blogging? Do you think I should keep the old posts? Delete them? Are you critical of your past work? Proud of it?


Sam
May 27, 2013 at 3:48 PMFor me, my blog is basically a public journal, a way to keep myself from getting into recipe ruts, and to network with other like-minded home cooks, so I’m happy to leave things as they are (although occasionally I will catch a typo in a past post and go in to fix it). I think you’re in a totally different situation–you’re doing food writing outside of this blog and have a social media business, so having really clean, pretty photos is much more important. I’m not sure where I stand on the to delete or not to delete question, I’m just adding my two cents…
Also, I want these in my belly.
Kirsten@farmfreshfeasts
May 27, 2013 at 9:42 PMDon’t delete old posts. If nothing else, it shows how far you’ve come.
And keep the words–I just learned me all ’bout meretricious thanks to you!
I love the Take 2 concept though–quite clever!
patience
May 28, 2013 at 12:51 AMI like the take 2 concept as well!
Listening to Lake Street Dive right now:)
Patti Smith-Lawrence
May 28, 2013 at 1:42 AMI just wanted to tell you that I love, love, love your blog and your recipes. I was feeling guilty about enjoying it without telling you so. So there it is. Thank you for sharing your thoughts and wonderful recipes. :0)
Meghan@CleanEatsFastFeets
May 28, 2013 at 10:55 AMI love the take 2 because I’m just now seeing this recipe and I most definitely want to make it. Pinned it.
I’ve gone back and looked at old posts and was utterly embarrassed. I will correct typos or reinsert photos where the old ones have disappeared. I do leave the basic post alone though so I can see how far I’ve come. On my actual recipe page, where it’s just the recipe and not the post, I will update the pictures if I get a new and better shot, which isn’t hard to do when I look back on some of those first recipes.
luckiest1
May 28, 2013 at 12:37 PMI say leave the old posts….they show you where you’ve been. My blog is more for me than for anyone else, and my photography skills still suck (more from lack of good equipment than lack of skill). But I love looking back 2 or 3 years to see what the seasons were like, what I was growing, what I was cooking, and comparing to where I am now! 🙂
I love the sound of this recipe. I might have to try it, once the seasonal corn arrives. You know, not the corn that the guy at the corner is advertising as “fresh picked!” in the middle of a frosty May….LOL
Teresa, foodonfifth.com
May 29, 2013 at 12:37 PMRegardless of how you feel about your old posts…this one does not suck! I love this combination of ingredients. Fresh corn is just the best thing. Now that summer is in full bloom here in Tennessee I plan to make this recipe. Bravo on “not sucking” Kristy. Beautiful photos.
10 Delicious Recipes to Make with Sweet Corn on the Cob - Knickerbocker Glory
August 6, 2014 at 1:16 PM[…] Pan fry fresh corn on the cob “cakes”. These bad boys come together very quickly so they make a prime appetizer or side dish to any […]
The FBC Weekly Menu Plan With She Eats | Food Bloggers of Canada
August 24, 2014 at 3:04 AM[…] Fresh Corn Cakes with Avocado Citrusy Goat Cheese Salsa […]